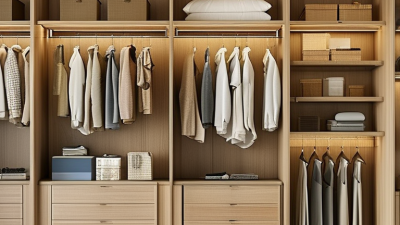
A heavy-duty closet should feel stable before it looks stylish. The right Closet Rod Bracket supports daily use, crowded hangers, and occasional mistakes. A weak bracket may bend, loosen, or pull away from the wall. That failure often begins quietly.
Julie Morgenstern, a respected organizing expert, says, “Organizing is not about getting rid of everything you own.” Her point matters here. A practical closet must carry what you genuinely use, not an idealized wardrobe. This guide examines seven Closet Rod Bracket options designed for demanding storage needs. It considers load capacity, material strength, mounting hardware, wall compatibility, and rod support. It also looks at installation details that product photos often hide.
Real experience changes the evaluation. A metal bracket can appear powerful, yet poor screws may ruin the installation. A thick rod can still sag when the span is too wide. Small details matter. Reinforced steel, secure flanges, anti-slip features, and corrosion-resistant finishes deserve close attention. So does the wall itself.
No bracket is perfect. Some models sacrifice appearance for strength. Others look refined but need better anchors. That trade-off deserves honest discussion. The best choice depends on closet width, rod diameter, clothing weight, and installation skill. We will compare these factors carefully, without treating one product as universally superior. Before choosing, measure twice, inspect the mounting surface, and consider how the closet may grow over time.
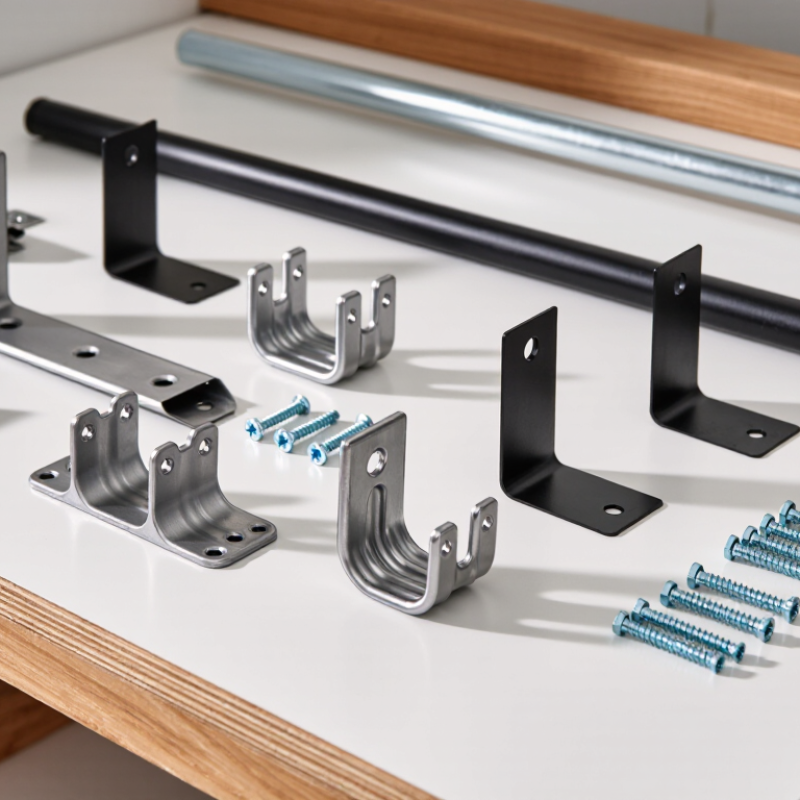
Heavy-duty closet rod brackets should be selected by load path, not appearance.
NAHB’s 2024 What Home Buyers Really Want report identifies walk-in closets as a highly desirable storage feature, increasing demand for stronger wardrobe hardware. Yet no universal building-code rating covers every closet bracket. ASTM F2057 addresses clothing-storage-unit stability, not wall-mounted rods. Therefore, a credible product should state its tested load, span, anchor type, and installation surface.
Estimate the total weight of clothing, hangers, and the rod itself. Then add a safety margin. A six-foot rod carrying 60 pounds can create significant bending force, especially when clothes are pulled from one end. Center supports reduce deflection. Steel brackets with deep plates, thick mounting holes, and anti-slip cradles usually perform better than thin stamped hardware.
Use structural screws for wood studs, and rated hollow-wall anchors only when stud mounting is impossible. Drywall alone is not a reliable primary support.
Pay attention to spacing. A long rod with two end brackets may sag before the fasteners fail. That detail is often missed. Professional installers commonly place an intermediate bracket near the midpoint, while heavier double-hang layouts may need closer support.
Manufacturer load claims should come from repeatable testing, ideally referencing recognized laboratory procedures. I would still test a sample gradually at home, because real walls are rarely perfect. A bracket can be strong, but a weak anchor changes everything.
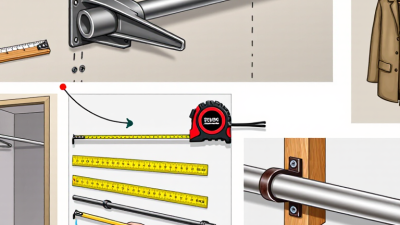
Choosing a bracket starts with the rod, not its appearance. Steel rods usually tolerate higher loads than hollow aluminum rods, but wall fixing still controls performance. ASTM A36/A36M specifies a 36 ksi minimum yield strength for qualifying structural steel. However, a bracket made from thin formed steel may perform differently. Check its tested capacity, wall spacing, and screw size. ASTM E488/E488M also shows why anchor testing matters, especially in masonry or concrete. A strong bracket cannot rescue a weak anchor.
Wood rods need broad, stable supports because they can sag over long spans. Measure the clear distance between brackets. Then add a center support when the rod approaches its listed span limit. Plastic or composite rods require extra caution. Their surface may look solid, while internal walls remain thin. Use padded, rounded supports to reduce crushing and scratches. I have seen installations fail because the rod rating was checked, but the drywall anchor was ignored. That mistake is easy to repeat.
7 Best Closet Rod Brackets for Heavy Duty Use
Choosing a heavy-duty closet rod bracket starts with mounting style, not advertised capacity. Wall-mounted brackets transfer load into studs or reinforced panels. Side-wall brackets spread force across two surfaces, while center supports reduce bending across long spans. The 2024 International Residential Code lists 16 inches as a common stud-spacing module, but real homes vary. Always locate the actual framing.
Weight distribution matters more than a single impressive load number. A 6-foot rod filled with coats creates greater deflection than evenly spaced shirts. The American Wood Council’s National Design Specification explains that span, material, and load placement directly affect bending performance. In practice, place a center support near the rod’s midpoint. Add another when heavy garments crowd one section. Small detail. Big difference.
Use structural screws that match the substrate, and avoid relying on drywall anchors for concentrated loads. The 2023 ASTM F2057 furniture-safety standard reinforces a broader lesson: secure installation matters as much as product design. I have seen brackets fail because the rod was strong, but the fasteners missed the stud. That mistake is easy to repeat. Capacity charts also deserve skepticism, since testing conditions may differ from household use. Check the bracket’s tested load, fastener requirements, support spacing, and wall material before installation. My own preference is a steel bracket with a broad mounting plate, though an oversized plate can still fail on weak backing.
Choosing among the seven best closet rod brackets for heavy-duty use starts with the wall itself. Measure the rod length, clothing weight, and bracket spacing before drilling. Solid wood studs provide the most reliable support. If studs are unavailable, use rated hollow-wall anchors designed for the expected load. Ordinary plastic plugs can fail under crowded winter clothes.
Hold each bracket against the wall and mark every hole with a pencil. Keep the supports level with a spirit level, not by eye. A small error can make hangers slide toward one side. Drill pilot holes into studs, then drive structural screws without over-tightening them. For masonry walls, use the correct bit and compatible anchors. Wear eye protection. Dust gets everywhere.
I once installed a rod slightly too low and ignored a soft, creaking bracket. It pulled away after several weeks. That mistake changed my checking routine. I now tug each support firmly before adding clothes, then inspect the rod after loading it gradually. Leave clearance between the rod and the wall, especially when using deep hangers. Center supports reduce bending on long rods, while closed brackets help prevent sideways movement. Check the screws again after a month. Hardware can settle. A level rod is useful, but secure contact matters more.
Heavy-duty closet rod brackets fail more often from poor maintenance than from weak metal. Check each bracket every six months. Look for widened screw holes, cracked anchors, rust, and a rod that bends visibly in the middle. A loose screw is an early warning, not a minor detail. Replace damaged wall anchors instead of tightening them repeatedly. That shortcut often hides deeper wall damage.
The U.S. Environmental Protection Agency recommends keeping indoor humidity between 30% and 50%. Moisture above that range can accelerate corrosion, especially in garages, laundry rooms, and bathrooms. The U.S. Consumer Product Safety Commission reports an annual average of about 15,400 emergency-room injuries involving furniture tip-overs among children under six, based on 2018–2020 data. Closet rods are different, but the lesson remains useful: secure loads and inspect attachment points. Heavy clothing packed tightly on one end can create uneven stress. I underestimated that during one installation. The bracket looked firm, yet the rod slowly tilted.
Tips: Weigh seasonal clothing before installation when possible. Keep the heaviest garments near the supports. Confirm that screws enter a stud or approved structural anchor. Test the rod with gentle downward pressure, not a sudden pull. Wipe condensation from metal surfaces. Recheck the hardware after moving the closet or changing the rod length. If the wall feels soft, stop. A stronger bracket will not repair weak drywall.
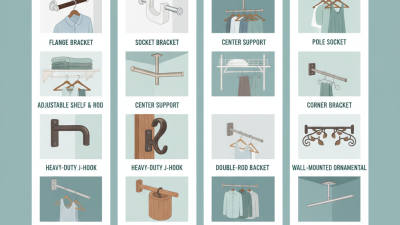
| Bracket Type | Typical Rod Compatibility | Typical Load Capacity* | Best Heavy-Duty Application | Recommended Mounting Surface | Maintenance Checks | Common Problems to Avoid |
|---|---|---|---|---|---|---|
| Center-Support Bracket | Round or oval rods, approximately 25–32 mm diameter | 30–45 kg per pair | Long closet sections where the rod may sag between the end supports | Wood stud, reinforced wood panel, or masonry with suitable anchors | Check the center screw and rod cradle every 6 months; confirm that the rod remains level. | Installing a long rod without center support; using short screws that do not reach solid material. |
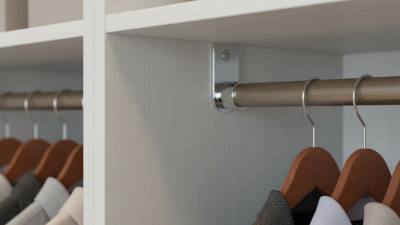
| Heavy-Gauge Steel Flange Bracket | Round rods, approximately 25 mm diameter | 35–50 kg per pair | Dense clothing loads and frequently used wardrobes | Solid wood or a properly positioned wall stud | Inspect for bent steel, loose screws, chipped coating, and early rust around screw holes. | Overloading the rod; mounting directly to weak drywall without rated hollow-wall anchors. |
| Double-Rod Bracket | Two parallel rods, commonly 25 mm diameter each | 45–65 kg per pair | Maximizing vertical storage for shirts, trousers, and shorter garments | Stud-backed wall or reinforced closet side panels | Check both rod cradles, the vertical plate, and the fasteners; verify that the two rods remain parallel. | Applying the combined load to one rod position; insufficient clearance between the two clothing levels. |
| Adjustable Shelf-and-Rod Bracket | Closet rods up to approximately 32 mm diameter, with an upper shelf | 40–60 kg per pair, depending on shelf material | Storage systems combining hanging garments with folded items | Studs, solid wood, or a continuous reinforced mounting rail | Retighten shelf and wall fasteners; inspect shelf clips and check for deflection or cracked laminate. | Ignoring the shelf load; using the rod bracket as the only support for a wide, heavy shelf. |
| Side-Wall Socket Bracket | Round rods, approximately 25–32 mm diameter | 25–40 kg per pair | Compact closets with support available at both side walls | Solid side panels, cabinet walls, or wall studs | Check socket alignment and make sure the rod is fully seated on both sides. | Mounting into thin panels without reinforcement; allowing the rod to rest only partially inside a socket. |
| Reinforced Corner Bracket | Round or oval rods, approximately 25–32 mm diameter | 30–45 kg per pair | L-shaped closets and corner installations requiring directional support | Two intersecting stud-backed walls or reinforced cabinet panels | Inspect the corner joint, both mounting plates, and any diagonal brace for movement or cracking. | Failing to support both wall directions; forcing a straight rod into a misaligned corner layout. |
| Continuous Mounting-Rail Bracket | Rod systems using a compatible rail and adjustable supports | 50–75 kg per pair when correctly anchored | Wide closets, modular storage, and installations needing adjustable bracket positions | Multiple studs or a properly rated continuous wall rail | Check rail anchors, bracket locking tabs, and rail alignment; redistribute supports if the rod begins to sag. | Relying on one or two anchors for a long rail; leaving locking tabs only partially engaged. |
| *Load capacities are typical planning ranges for a correctly installed pair of brackets using a suitable rod and evenly distributed clothing weight. Always follow the fastener, wall-anchor, rod, and mounting-surface limits. For long spans or unusually heavy storage, add a center support and verify the installation before use. | ||||||