A 3D Adjustable Concealed Hinge is a cabinet hinge hidden inside the door and cabinet frame. Unlike a basic concealed hinge, it allows three-way alignment. Installers can adjust the door vertically, sideways, and inward or outward. These movements help control gaps, reveal lines, and closing pressure.
“Precise adjustment is what turns a hinge into a reliable fitting,” says Michael Schmid, a cabinet-hardware engineering specialist. His observation reflects a practical truth: a concealed hinge is not merely hidden hardware. It is a small alignment system working behind the door. When the vertical screw raises or lowers the door, the side adjustment corrects uneven gaps. The depth adjustment brings the door flush with the cabinet face. Small movements matter.
Consider a tall kitchen door with a two-millimetre gap on one side. A three-dimensional hinge can often correct that imbalance without removing the entire door. It can also compensate for minor installation differences, seasonal movement, or a cabinet that is not perfectly square. Still, adjustment has limits. A hinge cannot repair a badly twisted cabinet or an incorrectly positioned mounting plate.
That distinction is easy to miss.
Choosing the right 3D Adjustable Concealed Hinge requires attention to door weight, overlay, cup size, opening angle, and mounting method. Soft-close performance also depends on the hinge design and door conditions. The best results come from accurate drilling, firm screw placement, and patient final adjustment. The term sounds technical, but its purpose is simple: helping a cabinet door sit straight, close smoothly, and remain dependable over time.
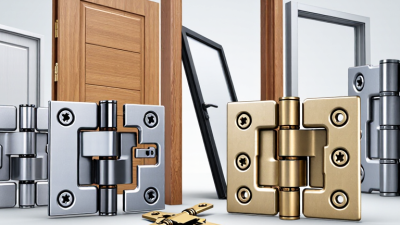
A 3D adjustable concealed hinge is a door hinge hidden inside the door leaf and frame. Its core function is supporting the door while allowing precise movement on three axes: height, side-to-side alignment, and closing depth. Installers can correct a 2–3 mm gap without removing the door. Small movement matters.
The hinge usually includes an adjustment cam, threaded screw, or movable mounting plate. These parts help align the door with the frame and maintain an even reveal around its edges. Proper adjustment can reduce rubbing, uneven seals, and latch misalignment. However, adjustment cannot repair a twisted frame or an overloaded door. That assumption is common, but incomplete. The hinge’s load rating, screw engagement, frame material, and door weight must be checked together.
Demand for reliable door hardware follows continued construction activity. The U.S. Census Bureau reported approximately 1.37 million privately owned housing units were authorized by building permits in 2024. This creates a large installation base for adjustable hardware, especially where clean interiors and concealed fittings are specified. Industry guidance also treats alignment as a practical durability issue, not only an appearance issue. The 2024 National Association of Home Builders Cost of Construction Survey highlights the growing importance of coordinated material selection and installation efficiency. In field work, installers should adjust each axis gradually, test the latch repeatedly, and avoid forcing the mechanism. Perfect alignment is not always immediate. Careful correction is more reliable than excessive tightening.
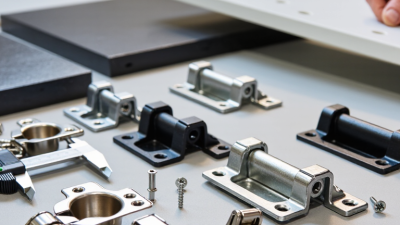
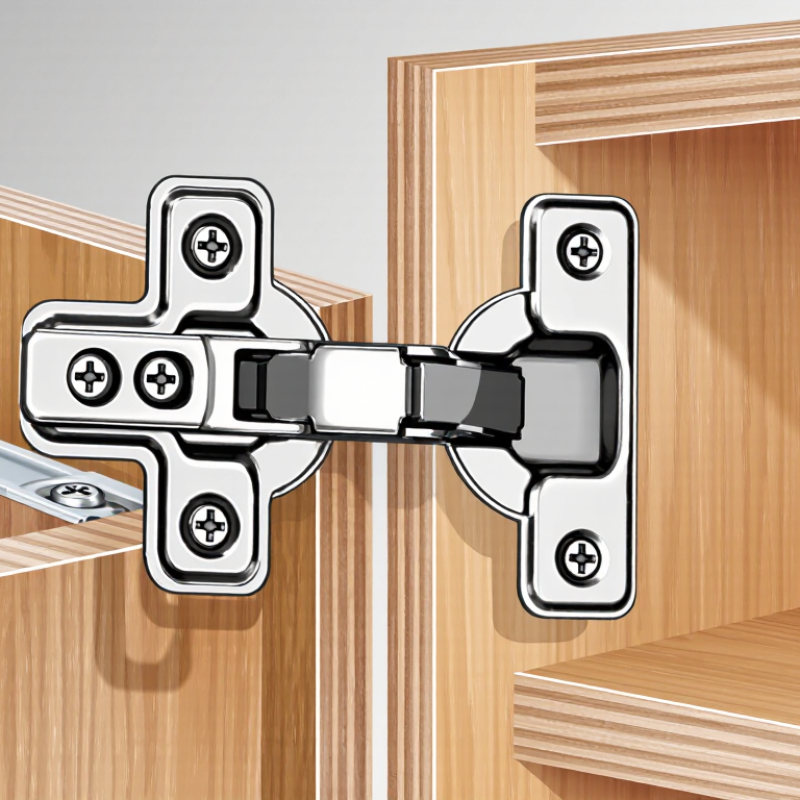
A 3D adjustable concealed hinge sits inside the cabinet door, so its hardware remains mostly hidden when the door closes. Its main parts include the hinge cup, hinge arm, mounting plate, adjustment screws, and fixing screws. The cup fits into a circular recess in the door, while the plate attaches to the cabinet side panel. Together, these parts support the door and control its movement.
Three-dimensional adjustment means changing the door in three directions. Side-to-side adjustment controls the gap between neighboring doors. Depth adjustment moves the door closer to, or farther from, the cabinet frame. Height adjustment raises or lowers the door through the mounting plate. Small turns matter. A quarter-turn can noticeably change a narrow 2-millimeter reveal.
Accurate adjustment starts with level cabinet installation and correctly tightened screws. I usually adjust one hinge slightly, then check the full door edge from top to bottom. This prevents one screw from carrying too much pressure. Soft-close models may include a built-in damper, but the hinge still needs proper alignment. I have seen installers focus only on the top hinge, causing the lower corner to drift. That method is not reliable. Door weight, panel thickness, and repeated use can also affect the final position. Check again after several openings. Small errors often become visible later.
A 3D adjustable concealed hinge sits inside the door and frame, keeping the hardware nearly invisible when the door closes. Its three adjustment directions control height, side position, and closing depth. These settings help correct small fitting errors after installation. They also support a cleaner gap around the door.
Common materials include stainless steel, plated steel, zinc alloy, and reinforced aluminum. Stainless steel suits humid rooms because it resists corrosion better. Plated steel can provide strong support for heavier timber doors. Zinc alloy allows detailed shapes, but its strength depends on the hinge design and load rating. Material alone does not prove quality. Check the stated weight limit, adjustment range, screw pattern, and cycle testing.
Door compatibility requires more than matching the hinge size. Measure the door thickness, weight, frame depth, overlay, and available clearance. Solid wood, MDF, and composite doors may need different fixing methods. Aluminum-framed doors often require a compatible profile and a narrower hinge body. Fire-rated or acoustic doors need certified hardware systems, not ordinary replacements. A common workshop mistake is choosing a hinge by appearance. I still check the door edge twice. Small measurement errors can cause rubbing, uneven gaps, or weak screw holding. Some adjustments also reduce the usable range when the door is heavily loaded.
A 3D adjustable concealed hinge sits inside the door and frame, leaving the exterior clean. Its three-way adjustment controls height, side-to-side position, and closing depth. In practice, accurate installation matters more than the hinge’s adjustment range. Measure the door thickness, frame rebate, and hinge locations before drilling. Mark every reference line with a sharp pencil. Use a template or measured jig to keep recesses consistent. The hinge leaves must sit flush, not proud of the timber. Even a small error can make the door scrape or leave an uneven shadow gap.
Start with the door supported on a stable workbench. Rout or chisel the hinge pockets carefully, removing thin layers rather than forcing the tool. Fix the frame side first, then hang the door with assistance. Close it slowly and inspect the reveal at the top, latch side, and bottom. Adjust vertical height before lateral position. Then fine-tune depth until the door face aligns with the frame. Turn each adjustment screw in small increments, usually a quarter turn, and test after every change. Do not rely on resistance alone. Overtightening can damage threads or distort the hinge body. Repeated checking beats fast correction, although it feels slower.
Tips: Keep a 2–3 mm working gap unless specifications require otherwise. Use a level, feeler gauge, and flashlight. Mark the original screw positions. If alignment changes after several openings, check loose fixings or a twisted frame. One overlooked hinge may be the real problem. Record final settings for future maintenance. Perfect alignment is not always immediate; timber can move with humidity, so review the door after a few days.
A 3D adjustable concealed hinge sits inside the door and frame, so the hardware remains hidden when the door closes. It usually allows vertical, horizontal, and depth adjustment. These settings help installers align uneven gaps around the door. A small adjustment can correct rubbing, drifting, or an inconsistent reveal. The result looks clean. It also supports precise installation in modern cabinetry, interior doors, and architectural panels.
The main benefit is easier alignment after installation. Seasonal movement, building settlement, or repeated use can change a door’s position. A 3D hinge provides room for correction without removing the entire door. This saves labor and protects finished surfaces. Many models also support soft closing or limited opening control. However, adjustment ranges are not unlimited. Excessive correction can stress the hinge, distort the frame, or reduce closing performance.
Installation quality still matters. The hinge cup and mounting plate need accurate routing, firm screws, and a suitable door thickness. Heavy doors may require several hinges and careful load distribution. In field work, installers often adjust one axis at a time, then check the gap with a ruler or feeler gauge. Small errors remain easy to miss. A hinge may appear aligned before the door is fully loaded. Typical applications include kitchen cabinets, wardrobes, flush interior doors, office partitions, and concealed access panels. Damp environments need corrosion-resistant materials and protected fasteners. Clearance around seals and adjacent panels should be checked before final adjustment.
| Data Dimension | Typical Information | Practical Benefit | Limitation or Consideration |
|---|---|---|---|
| Definition | A concealed door hinge installed inside the door and frame, with adjustment available in three directions. | Keeps the hinge largely hidden when the door is closed while allowing alignment after installation. | The hinge pocket and frame preparation must be accurately machined or routed. |
| Three adjustment axes | Height, side-to-side position, and depth or compression adjustment. | Compensates for small installation errors, material movement, and changes in door alignment. | Adjustment ranges differ by hinge design and should not be treated as universal. |
| Typical adjustment range | Many architectural models provide several millimetres of adjustment per axis; the exact range is product-specific. | Allows the installer to fine-tune reveals and maintain a consistent door gap. | A large misalignment usually requires correcting the frame or door, not relying only on hinge adjustment. |
| Load capacity | Common interior-door systems are often rated for approximately 40–120 kg per door, depending on the number of hinges and installation conditions. | Can support many residential and commercial doors without visible surface hardware. | Capacity depends on hinge spacing, door size, frame strength, fasteners, and repeated-use cycles. Always follow the tested rating. |
| Door weight distribution | Two or more hinges are normally used, with the upper hinge carrying a significant portion of the load. | Correct positioning improves stability and reduces sagging. | Heavy, tall, wide, or frequently used doors may require additional hinges or a higher-capacity system. |
| Opening angle | Typical concealed hinges commonly provide opening angles from about 90° to 180°, depending on geometry and stops. | Supports applications ranging from standard room doors to wide-clearance openings. | The frame, wall, door trim, and hinge-side clearance can restrict the actual opening angle. |
| Materials and finish | Common materials include zinc alloy, steel, and stainless steel, with painted, plated, or corrosion-resistant finishes. | Provides options for strength, corrosion resistance, and compatibility with interior design requirements. | Coating durability depends on the environment, cleaning chemicals, humidity, and installation quality. |
| Installation method | Usually requires mortising or routing pockets in both the door leaf and the frame, followed by fixing and adjustment. | Creates a clean, flush appearance with no exposed hinge knuckles on the closed door. | Installation is more time-consuming and less forgiving than installing a surface-mounted butt hinge. |
| Visual appearance | The hinge body is concealed when the door is closed; only the door gap and surrounding hardware remain visible. | Improves minimalist, flush-door, and high-end architectural aesthetics. | The hidden mechanism may be harder to inspect or access for maintenance. |
| Adjustment after installation | Set screws or cam mechanisms are used to move the door vertically, laterally, and toward or away from the frame. | Makes door-gap correction faster than removing and re-shimming the entire door in many cases. | Access to adjustment screws may be limited when the door is installed or when trim is present. |
| Typical applications | Flush interior doors, offices, hotels, apartments, conference rooms, cabinets, and contemporary commercial interiors. | Suitable where appearance, alignment control, and a clean door surface are important. | May be unsuitable for retrofit projects with limited door thickness, weak frames, or insufficient hinge-pocket depth. |
| Fire and smoke doors | Only hinges specifically tested and approved for the relevant door assembly should be used. | A compliant concealed hinge can support a clean appearance in regulated door assemblies. | Not all concealed hinges are fire-rated. Certification must cover the complete door, frame, hardware, and installation method. |
| Main selection criteria | Door weight, dimensions, thickness, opening angle, frame type, usage frequency, environment, and required certification. | Matching the hinge to the actual operating conditions improves service life and alignment stability. | A visually similar hinge may have a different load rating, pocket size, adjustment range, or approval status. |
Note: Performance values are typical industry ranges for general comparison. Always verify the manufacturer’s technical data, tested load rating, installation instructions, and applicable building-code requirements for the selected hinge.