How to Choose a 3D Adjustable Concealed Hinge in 2026
Choosing a 3D Adjustable Concealed Hinge in 2026 means matching the hardware to the door, frame, and daily use—not just its finish. The hinge sits out of sight, but its adjustment points can help correct small changes in height, side clearance, and closing position. Small shifts matter. A few millimeters can prevent a door edge from rubbing against the frame or leaving an uneven gap.
Start with the door’s weight, thickness, and opening angle, then check the hinge’s rated capacity and required cutout dimensions. Compare those figures with the manufacturer’s current specifications; product names and ratings can vary. Not every door behaves alike. Timber, composite, and heavier panels may place different demands on the hinge and its fasteners. If soft-close action is important, confirm that the model includes it rather than assuming it comes standard. A feature list can be easy to misread.
This guide explains how to assess adjustment range, load capacity, materials, installation requirements, and long-term serviceability. It also points out where a simple checklist may not replace a careful measurement or advice from a qualified installer. In practice, frame alignment and workmanship can affect results as much as the hinge itself. There is no perfect shortcut. Use the details in this guide to compare options, verify fit, and choose hardware that suits the actual door—not merely the product photo.
What a 3D Adjustable Concealed Hinge Is and How It Works
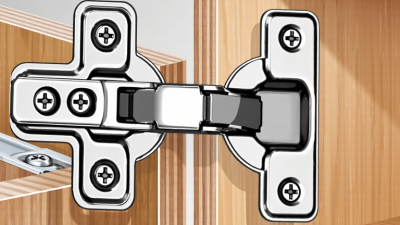
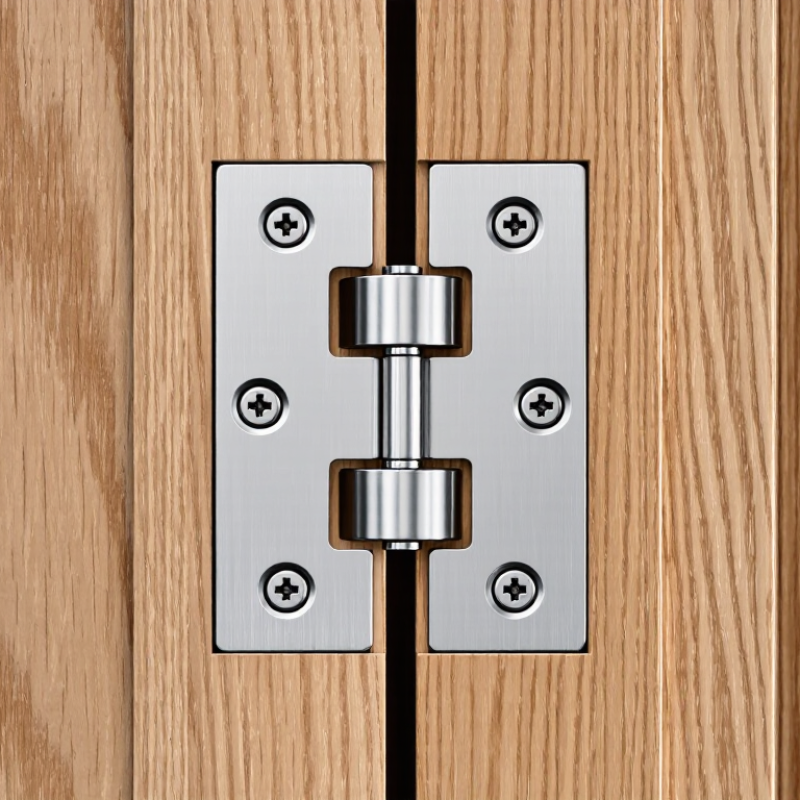
A 3D adjustable concealed hinge connects a cabinet door to its frame while staying out of sight when the door is closed. Its hinge arms sit inside routed recesses, so the outside surface looks clean. “3D” refers to adjustment in three directions: side to side, up and down, and in or out. Small screws or cams shift the door without requiring the whole hinge to be removed. The exact adjustment method varies by design.
These movements help correct common fit problems. A narrow, uneven gap between two doors may need a side adjustment. A door that rubs against the cabinet base may need a height adjustment. If the front sits proud of the cabinet, an in-and-out adjustment can bring it closer. Make small changes, then close the door and inspect the gaps from several angles. That matters. A quarter-turn can be enough.
The hinge does not compensate for every installation error. Recesses must be positioned accurately, and the door’s weight must suit the hinge’s rated capacity. Follow the hinge maker’s instructions for screw access and adjustment limits; forcing a cam can damage it. In practice, the first adjustment is rarely perfect. That’s normal. Check the door again after repeated opening, since a loose fixing or a slightly misaligned frame can change how it hangs.
Which Door and Frame Requirements to Measure First
Before choosing a 3D adjustable concealed hinge, measure the door and frame—not just the opening. Record the door’s thickness, height, width, and weight, including any glass or attached panels. A solid door can weigh far more than its size suggests. Check the frame material and available fixing depth, too; a shallow or hollow section may not support the hinge as expected. Small details matter.
Measure the hinge-side and top clearances with the door closed, then note the existing reveal gaps. Check how far the door must open and whether nearby walls, handles, or trim will interfere. Measure the proposed hinge pocket carefully against the hinge’s installation drawing. A few millimeters can affect the fit. I would recheck the measurements after marking the cutout; it is easy to trust one reading too much. Also compare the door’s weight and dimensions with the hinge’s rated capacity and adjustment range. Three-way adjustment can help correct alignment, but it cannot reliably fix an oversized pocket, weak fixing material, or a door that exceeds the specified load. Verify the manufacturer’s fitting instructions for the exact door-and-frame combination.
How to Compare Adjustment Range, Load Capacity, and Materials
A 3D adjustable concealed hinge lets installers fine-tune a door in three directions: height, side-to-side position, and depth. Compare each adjustment range with the gaps your project needs to correct. Check the product’s stated range, not just the number of adjustment axes. A few millimeters matter. If a frame is uneven, limited depth adjustment may leave the door sitting proud. Confirm how adjustments are made and whether they remain accessible after installation.
Load capacity should match the complete door, including its dimensions and hardware. Compare the hinge’s rated capacity with the door’s weight, and check how many hinges that rating assumes. A taller or wider door can place more stress on the fitting, even at the same weight. Leave a sensible margin rather than choosing a hinge right at its limit. The calculation is easy to overlook.
Material choice affects durability in the actual installation environment. Steel may suit many interior doors, while moisture-prone areas call for verified corrosion-resistance details. Review the finish, base material, and any published cycle-test information. Also check that the fixing method suits the door and frame materials. Specifications help, but site conditions can differ; inspecting a sample before ordering may reveal a fit issue that a chart misses.
How to Check Compatibility, Installation, and Fine-Tuning
A 3D adjustable concealed hinge can correct small alignment problems, but it must suit the door and frame. Check the door’s thickness, weight, opening direction, and overlay before choosing a model. Compare these measurements with the hinge’s installation sheet, including required recess dimensions and screw positions. A hinge that fits the cavity may still be unsuitable for a heavy or unusually wide door. Measure twice. It saves rework.
During installation, support the door so its weight does not pull against the new screws. Mark the recess carefully, and keep the hinge leaves level with the surface. Even a slight tilt can create uneven gaps or make the door rub. Use the specified fasteners for the door and frame materials; do not assume one screw type works everywhere. Test the door’s movement before tightening everything fully.
Fine-tuning usually means adjusting height, side-to-side position, and depth in small increments. Change one axis at a time, then close the door and inspect the gap along the top and latch side. A narrow strip of paper can reveal spots where the door pinches. If adjustments reach their limits, revisit the fit, recess, and frame alignment instead of forcing the screws. That step is easy to overlook. Recheck after several open-and-close cycles, since the door may settle slightly.
How to Evaluate Durability, Safety, and 2026 Product Standards
How to Choose a 3D Adjustable Concealed Hinge in 2026
A concealed hinge should move a door smoothly without loosening over time. Start with the door’s weight, height, and material, then check that the hinge’s rated capacity matches the full installation. Ask for test data covering opening cycles, load performance, and corrosion resistance. A polished finish looks reassuring, but it proves little about the parts hidden inside. Fit matters.
For safety, inspect the fixing method and confirm that the frame and door can hold the specified screws. Check that adjustments remain stable after repeated use, and look for clear installation instructions. In 2026, requirements may vary by market and application. Verify current local standards and dated test reports; a “2026 compliant” label alone is not enough. I would also test a sample door, because real alignment can be less tidy than a drawing suggests.
Tips: Open and close the door slowly, then check for sag, rubbing, or uneven gaps. Recheck the screws after installation. Keep the adjustment range within the hinge’s stated limits, and ask the supplier to explain any missing test details.
How to Choose a 3D Adjustable Concealed Hinge in 2026
Durability reference points from EN 1935:2002 hinge endurance classifications.
Use cycle ratings as one durability checkpoint, alongside load capacity, corrosion resistance, and adjustment stability. EN 1935 covers single-axis hinges; do not assume its classifications apply to a 3D adjustable concealed hinge. For a 2026 purchase, confirm the applicable standards and market requirements for the specific product, and check that safety and load documentation matches the intended door.